
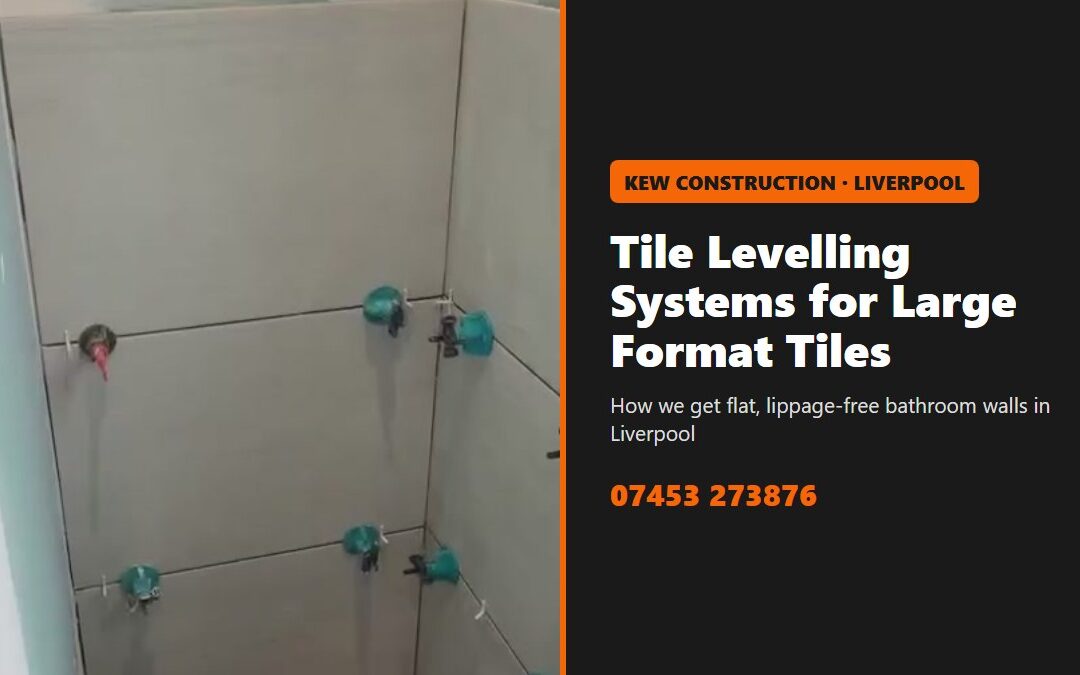
A tile levelling system is one of the simplest tools on a tiler’s van, and one of the biggest reasons a modern bathroom in Liverpool looks crisp rather than slightly wavy. If you have ever run your hand across a tiled wall and felt one tile sitting a fraction proud of the next, or noticed a shadow line along a joint when the light comes in from the side, you have seen the problem these little clips solve. This guide explains what a levelling system is, why we use one on large format tiles, what it can and cannot fix, how the job is done step by step, and what to ask your tiler before work starts.
What Is a Tile Levelling System?
A tile levelling system is a set of small parts that hold the edges of neighbouring tiles at exactly the same height while the adhesive sets. Most systems have two parts:
- A clip or strap that sits under the edges of two (or four) tiles, in the joint between them. It also acts as a spacer, setting the width of the grout line.
- A cap, wedge or screw top that is tightened down onto the faces of the tiles. As it tightens, it pulls the tile edges level with each other and holds them there.
Once the adhesive has cured, the top is knocked off and the clip snaps cleanly below the surface of the tiles. The joints are then grouted as normal and nothing of the system can be seen. The clips are single-use; the caps or wedges are usually reusable.
You will see a few different styles. Wedge systems use a plastic wedge pushed through a slot in the clip. Cap or screw systems, like the turquoise caps in our photos, screw down onto a threaded clip and are popular for walls because the pressure can be adjusted precisely. Both do the same job: keeping the tile faces flush.
Lippage: The Problem a Tile Levelling System Solves
Lippage is the trade word for a step in height between the edges of neighbouring tiles. A small amount is normal on handmade or textured tiles, and British Standards allow for it, but on flat, smooth, modern tiles even a tiny step is easy to see and feel. It shows up most when:
- the tiles are large, because a longer edge makes any step more obvious;
- the grout lines are narrow, as they usually are with rectified tiles;
- the tiles are glossy or a pale plain colour;
- light hits the wall at a low angle, from a window or a row of downlights close to the wall.
Lippage is not only about looks. On a floor, a raised edge is a trip point and is more likely to chip. In a shower, an uneven surface can hold water and make the glass screen or tray trims harder to fit neatly.
Why Large Format Tiles Need a Tile Levelling System
Large format tiles, usually described as tiles with at least one side of 600 mm or more, are now the most popular choice in the bathrooms we fit across Merseyside. They give a calm, modern look with fewer grout lines, and they make a small room feel bigger. Our guide to large format tiles in a small bathroom covers the design side.
The catch is that almost no large porcelain tile is perfectly flat. During firing, long tiles can develop a very slight bow, often highest in the middle. Lay two bowed tiles end to end and the ends meet low while the middles sit high, and you get a step at the joint. The manufacturers know this, which is why many recommend offset patterns of no more than a third of the tile length for long tiles rather than a half bond.
A tile levelling system pulls each edge into line with its neighbour while the adhesive is still soft. It cannot take the bow out of a tile, but it makes sure the edges meet flush, which is what the eye notices.
A Recent Bathroom: Large Format Tiles Going Up
The photo below is from a bathroom we are tiling in Liverpool this week. The shower recess is being tiled in large format grey tiles laid horizontally, with a levelling clip and cap at each joint along the edges. You can see the caps on both walls and turning the internal corner, where the alignment of two walls meeting is especially important for the shower screen to sit neatly later.
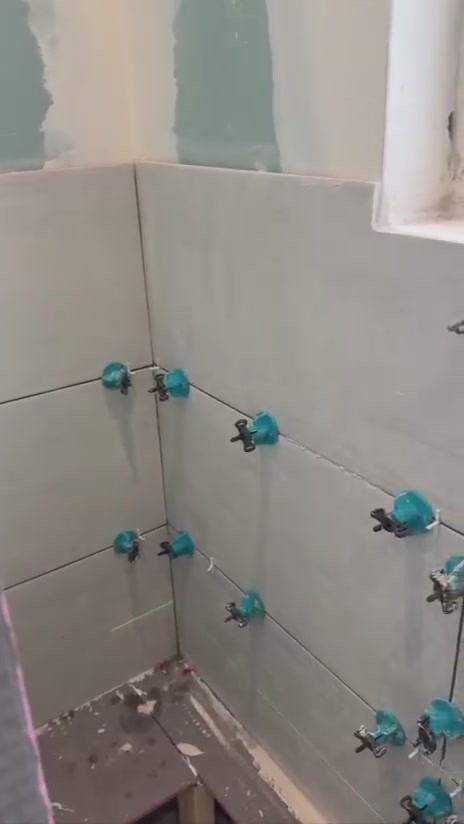
Each tile is fully bedded in adhesive, the clips go into the joints as each tile is placed, and the caps are tightened before moving on. The next day, once the adhesive has set, the caps come off, the clips are snapped out, and the wall is ready for grouting.
What a Tile Levelling System Cannot Do
This is the part that is often misunderstood. A levelling system lines tiles up with each other. It does not make a crooked wall straight or a bumpy floor flat. If the surface behind the tiles is out by several millimetres, the tiles will follow it, and the system will simply pull the whole wall into a smooth curve that follows the bumps.
That is why the preparation matters more than the clips. Before any large format tile goes on, the wall or floor needs to be flat within tight tolerances. Depending on what we find, that can mean:
- Re-boarding walls with a suitable board rather than tiling onto old, uneven plaster;
- Using a tile backer board in wet areas; our comparison of tile backer board vs plasterboard explains when each is right;
- Levelling a floor with a self-levelling compound, as covered in our guide to levelling uneven floors;
- Checking with a long straight edge and a laser so we know where the high and low points are before the first tile goes on.
How We Fit Large Format Tiles with a Tile Levelling System
Every bathroom is different, but the steps below are how we approach large format wall tiles on a typical Liverpool bathroom renovation.
- Check and prepare the surface. We check the walls for flatness and soundness, make sure the board or plaster can take the weight of the tiles, and waterproof the shower area properly before any tiling starts.
- Plan the layout. We work out where the cuts will fall so you do not end up with thin slivers at the corners, ceiling or around the window, and we decide the starting line.
- Set a level starting line. A laser and a temporary batten give a perfectly level line for the first full row. The bath or tray is rarely perfectly level, so the bottom row is often cut to suit.
- Apply adhesive to the wall and the tile. For large tiles we comb adhesive onto the wall and also onto the back of the tile, known as back-buttering, so there are no hollow spots behind it.
- Place the tile and fit the clips. Each tile is pressed and slid into place, the clips go under the edges at the recommended spacing, and the caps or wedges are tightened down.
- Check as we go. We check the coverage on the back of a tile now and then, and keep an eye on the joints and the level as each row goes up.
- Let it set, then remove the system. Once the adhesive has cured, the caps come off and the clips are knocked out in line with the joint so they break cleanly.
- Grout and seal. The joints are cleaned out, grouted, and the internal corners and junctions with the tray or bath are finished with a flexible sealant rather than grout.
Back-Buttering and Adhesive Coverage
A tile levelling system works best when every tile is solidly bedded. Hollow spots behind a large tile can cause cracks later, especially on a floor, and in a shower they can hold water. Industry guidance calls for near-full adhesive coverage on wall tiles in wet areas and on floors, and for large tiles the reliable way to achieve that is to comb adhesive onto the wall with the right notched trowel and back-butter the tile as well.
It also matters which adhesive is used. Large porcelain tiles need a good quality flexible cement-based adhesive, and heavier tiles may need a rapid-setting or non-slump type so they do not slide down the wall before the clips and the adhesive hold them.
Weight Limits: Can Your Walls Take Large Format Tiles?
Large tiles are heavy, and the weight is something we always check. British Standard guidance commonly limits the combined weight of tiles plus adhesive to around 32 kg per square metre on plasterboard and around 20 kg per square metre on a plaster skim. A 10 mm porcelain tile plus adhesive can come close to that, and thicker or natural stone tiles can exceed it. Cement-based backer boards and some foam boards allow heavier tiles, so the board is chosen to suit the tile, not the other way round.
If you are choosing tiles before we have visited, it is worth sending us the tile details so we can confirm the walls will take them. The Tile Association publishes technical guidance for installers, and you can find out more about installation standards on the Tile Association website.
Showers and Waterproofing Behind the Tiles
Tiles and grout are not waterproof on their own. In a shower, water will eventually find its way through grout lines, so the wall behind the tiles must be waterproofed. That means either a tanking system on a suitable board, or a waterproof backer board with sealed joints and corners. Moisture-resistant plasterboard is fine for the rest of the bathroom, but it is not a waterproof surface for a shower wall on its own. Our guide on how to tank a wet room explains how tanking works.
A tile levelling system plays a small part here too: flat, flush tiles shed water evenly and give the shower screen and trims a true surface to seal against.
Tile Levelling System Mistakes to Avoid
- Relying on clips to fix a bad wall. Prepare the surface first; the system cannot flatten it.
- Too few clips. Large tiles need clips along every edge at the spacing the manufacturer recommends, not just at the corners.
- Over-tightening. Cranking the caps too hard can squeeze adhesive out from under the edges and leave the middle of the tile proud.
- Skipping back-buttering. Clips hold edges, not the middle. Without full coverage, the centre of a large tile can be hollow.
- Removing clips too early. Wait until the adhesive has set, or the tiles can move.
- Knocking clips off the wrong way. Strike them in line with the joint, or they can chip the tile edge.
- Ignoring the offset. A half bond with long tiles exaggerates any bow; a third offset or less usually works better.
- Grouting the corners. Internal corners and junctions with the bath or tray move slightly and need flexible sealant.
Does a Tile Levelling System Add to the Cost?
Only slightly. The clips are inexpensive and the caps or wedges are reused from job to job, so for a typical bathroom the materials add tens of pounds rather than hundreds. Fitting them adds a little time per tile, but it saves time on fiddling with tiles to get them flush, and it reduces the risk of having to lift and refix a tile. For large format tiles we include a levelling system as standard in our tiling prices.
The bigger cost factors in a tiling job are the size of the area, the preparation the walls need, the number of cuts and the type of tile. Our bathroom tiling cost per square metre guide gives typical Liverpool prices, and our herringbone tiling guide covers patterns that take longer to lay.
Is a Tile Levelling System Only for Big Tiles?
Mostly, but not only. Smaller tiles such as metro tiles or mosaics rarely need one, because short edges make small steps hard to see and the tiles are easier to bed flat. Medium tiles, around 300 by 600 mm, benefit in long runs or where there is strong side lighting. Wood-effect plank tiles on floors almost always need a system, because their long, narrow shape makes any bow more pronounced. For very thin porcelain panels and slabs, specialist systems and techniques are used instead.
Questions to Ask Your Tiler
- How will you check the walls are flat enough for large format tiles, and what will you do if they are not?
- Will the walls take the weight of the tiles I have chosen?
- How will the shower area be waterproofed before tiling?
- Will you back-butter the tiles and use a levelling system?
- Where will the cuts fall, and what offset will you use for these tiles?
- Which adhesive and grout will you use, and how long before the shower can be used?
A good tiler will be happy to answer all of these. If you are planning a full bathroom, our guide to what goes on behind the tiles explains the hidden work that makes the finished room last.
Why Choose Kew Construction for Large Format Tiling in Liverpool
- Preparation first. We check, board, level and waterproof before the first tile goes on.
- The right tools. Lasers, long straight edges and a tile levelling system on every large format job.
- Planned layouts. Cuts are planned so the finished wall looks balanced, with no thin slivers.
- Clear, fixed quotes. You know the price before work starts.
- Local and reviewed. Kew Construction is reviewed on Google, Checkatrade, MyBuilder and Trustpilot.
Book Your Bathroom Tiling in Liverpool
Kew Construction is a family-run bathroom, tiling and renovation business based in Liverpool, working across Merseyside, including Bootle, Crosby, Formby, Maghull, Aintree and the Wirral. Whether you are tiling a single shower wall or renovating a whole bathroom with large format tiles, we can visit, check the walls and floor, and give you a fixed price.
Call Ariel on 07453273876 or email Info@kewconstruction.com to arrange a free visit and quote. You can see more of our work on Instagram.
Frequently Asked Questions
What is a tile levelling system?
A tile levelling system is a set of clips and caps, wedges or screw tops that hold the edges of neighbouring tiles at exactly the same height while the adhesive sets. The clip sits under the tile edges in the joint, the cap or wedge is tightened down onto the tile faces, and once the adhesive has cured the top is knocked off and the clip snaps away below the surface, ready for grouting.
Do I need a tile levelling system for large format tiles?
For tiles of around 600 mm or more on one side we strongly recommend one. Large tiles are rarely perfectly flat, and the longer the edge the easier it is to see any step between neighbouring tiles, especially with side lighting. A levelling system makes those steps, known as lippage, far less likely.
Does a tile levelling system fix an uneven wall or floor?
No. A levelling system lines up the edges of tiles with each other; it does not flatten the surface behind them. Walls and floors still need to be flat before tiling, which may mean re-boarding, skimming, or a levelling compound on the floor. The system then handles the small differences that remain.
How much does a tile levelling system add to the cost?
The clips are single-use and inexpensive, and the caps or wedges are reusable, so the materials usually add tens of pounds to a typical bathroom rather than hundreds. Fitting them adds a little time, but it saves time on adjusting tiles and gives a noticeably better finish.
Can large format tiles go on plasterboard?
They can on a suitable board if the total weight of the tiles plus adhesive stays within the board’s limit, which British Standard guidance commonly puts at 32 kg per square metre for plasterboard and 20 kg per square metre for a plaster skim. In shower areas the wall also needs proper waterproofing, either a tanking system or a waterproof backer board.
How long do levelling clips stay in?
The clips stay in until the adhesive has set firmly, usually overnight or as long as the adhesive manufacturer specifies. Removing them too early can disturb the tiles. Once set, they are knocked off in the direction of the joint so they break cleanly below the tile surface.
Which areas does Kew Construction cover?
Kew Construction is based in Liverpool and works across Merseyside, including Bootle, Crosby, Formby, Maghull, Aintree and the Wirral.