
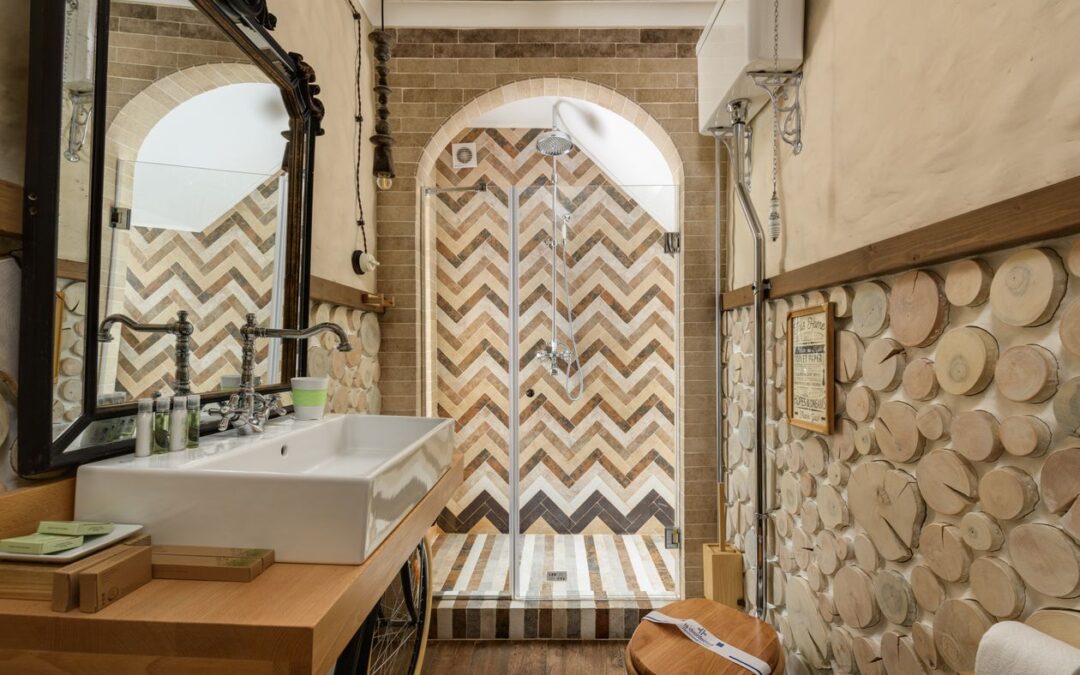
Herringbone tiling is one of the few tile patterns that looks as good in a Victorian terrace as it does in a new-build kitchen. Laid well, it makes a narrow hallway feel longer, turns a plain shower wall into the feature of the room and hides the slight irregularities of handmade-look tiles. Laid badly, it drifts off square, ends in slivers against the skirting and shows every dip in the floor. This guide covers what herringbone tiling actually is, where it works best, which tiles to choose, how a herringbone floor or wall is set out, what herringbone tiling costs in 2026 and the mistakes to avoid.
What Herringbone Tiling Actually Is
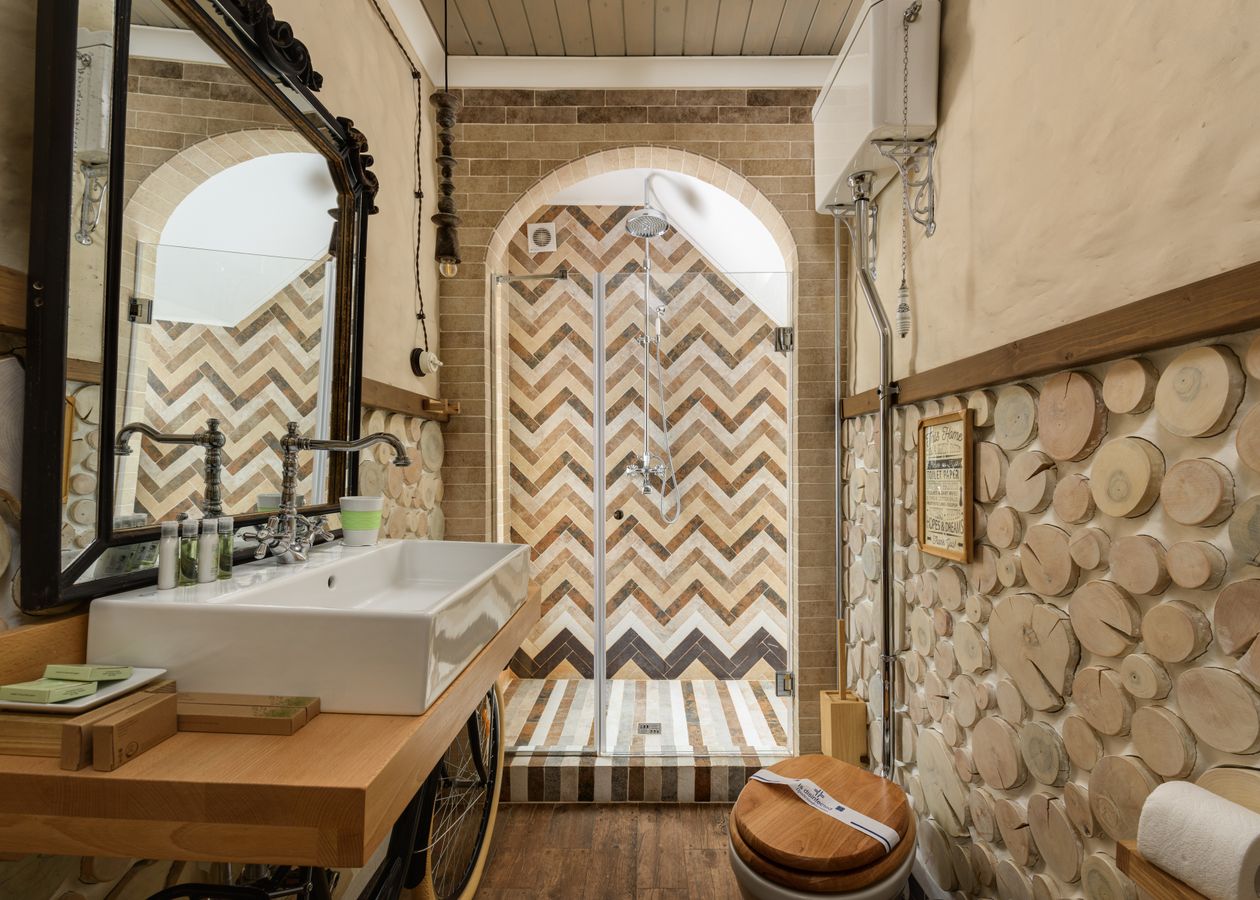
Herringbone is a pattern of rectangular tiles laid in a zig-zag, with the end of each tile butting up against the long side of the next at a right angle. It takes its name from the skeleton of a herring, and it has been used for brick paving and parquet floors for centuries.
It is often confused with chevron. In a chevron pattern, the ends of each tile are cut at an angle so the tiles meet point to point, creating a clean, continuous V. In herringbone, the tiles are plain rectangles and overlap in a stepped zig-zag. Chevron needs tiles made specifically for it; herringbone can be laid with almost any rectangular tile.
Herringbone can also be laid at two different angles:
- 45 degrees to the walls, the classic layout, where the zig-zag runs straight down the room. It draws the eye along the length of a space, which is why it suits hallways and long kitchens.
- 90 degrees (sometimes called straight herringbone), where the tiles run parallel and perpendicular to the walls. It looks more structured and produces fewer awkward cuts at the edges.
Where Herringbone Works Best
- Bathroom floors. Small-format herringbone tiles cope well with the gentle falls needed around a shower, and the pattern adds interest to a floor that is often the largest uninterrupted surface in the room.
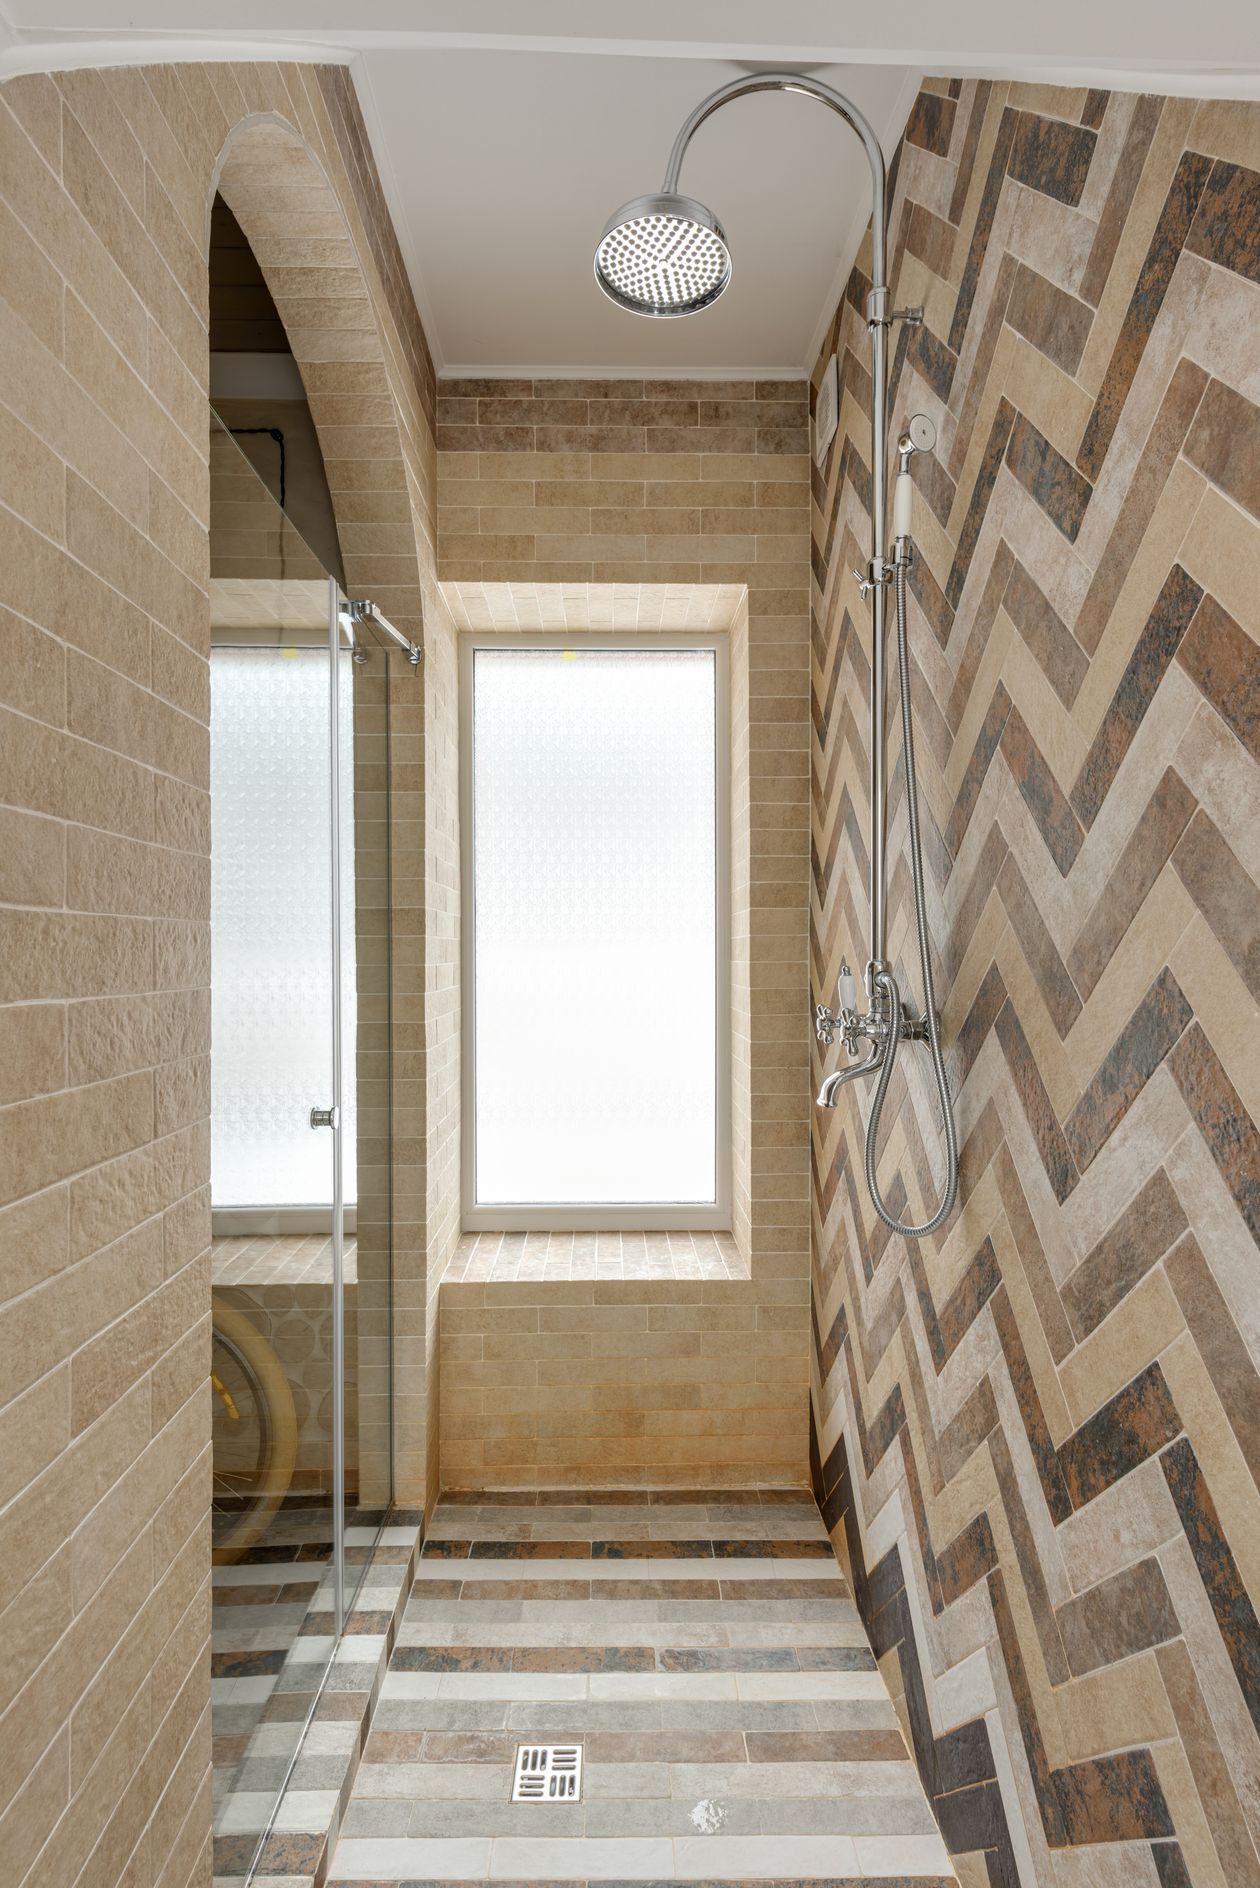
- Shower walls and feature walls. A single wall of herringbone behind a shower or bath gives a strong focal point without overwhelming a small room. The rest of the walls can stay in a simple straight lay in the same tile.
- Kitchen splashbacks. A small area, so the extra labour is affordable, and a herringbone splashback is one of the most effective ways of lifting a plain kitchen.
- Hallways. Liverpool’s terraces often have long, narrow hallways. Herringbone laid down the length of the hall exaggerates the length and suits the period character, much like the original encaustic and geometric floors in many of these houses.
- Kitchen-diners and open-plan rooms. Herringbone can run through a large space and tie separate zones together, though the labour on a big floor adds up.
Herringbone is harder to justify in a very small cloakroom full of pipes and fittings, where almost every tile needs cutting and the pattern barely has room to show. A straight or brick-bond lay in the same tile often looks cleaner there.
Choosing Tiles for a Herringbone Pattern
Shape and size
Any rectangular tile can be laid in herringbone, but the shape changes the look. Long, narrow tiles, with the length at least three times the width (for example 75 x 300mm or 150 x 600mm), give the crisp, well-defined zig-zag most people picture. Squatter tiles at 1:2 look busier and less defined. Many manufacturers now sell tiles specifically for herringbone, including wood-effect porcelain planks and slim metro-style tiles.
Material
- Porcelain is the best choice for floors: dense, hard-wearing and suitable for underfloor heating.
- Ceramic is lighter, cheaper and easier to cut, and works well on walls and splashbacks.
- Natural stone and marble look superb in herringbone but need sealing, careful handling and more cutting time, which puts the cost up.
- Handmade-look or zellige-style tiles suit herringbone well because their natural variation hides small differences in joint width.
Slip resistance
For bathroom floors and especially walk-in showers, check the slip rating. Tiles rated R10 or R11 are the usual choice for wet areas. Small tiles also help, because the extra grout lines add grip underfoot.
Rectified edges and batches
Rectified tiles are machine-cut to precise, square edges, which allows tighter, more even grout joints. That matters more in herringbone than in a straight lay, because any variation in tile size is multiplied across the zig-zag. Order everything from the same batch, including the extra for wastage, because shade can vary noticeably between batches.
How a Herringbone Floor or Wall Is Set Out
Setting out is where herringbone is won or lost. It takes longer than laying the tiles themselves on a small job.
- Decide the direction. The zig-zag usually runs along the longest sightline, typically from the doorway you enter by, or down the length of a hall. On a wall, it normally runs vertically, pointing upwards.
- Mark a centre line. A straight reference line is snapped down the middle of the floor or wall. The points of the pattern are kept on this line, so the herringbone stays true and balanced from side to side.
- Dry lay and plan the cuts. The pattern is laid out without adhesive to check where it will finish at each wall. The aim is to avoid thin slivers at the edges, especially at the doorway and in front of the bath or shower, where they are most visible.
- Check square as you go. A small error in the first few tiles grows with every row. Experienced tilers check the pattern against the centre line and with a square every few courses.
- Plan the edges and thresholds. Every tile at the perimeter needs an angled cut. Where the herringbone meets another floor, the transition strip and the direction of the pattern should be planned together.
In showers, a linear drain along one wall usually works better with herringbone than a central gully, because the floor falls in one direction and the pattern does not need to be cut into four sloping sections around a drain.
Grout joints of around 2 to 3mm suit most herringbone layouts. A contrasting grout emphasises the pattern; a matching grout lets the shape of the tiles do the work and is more forgiving of small variations.
Why the Surface Underneath Matters Even More
Herringbone shows up every imperfection in the surface underneath. Each tile meets its neighbours at several points, so if the floor dips or humps, the tile edges sit at different heights (known as lippage) and the points of the zig-zag catch the light. Walls need to be flat and plumb for the same reason. The Tile Association, the UK tiling industry body, publishes guidance on preparing backgrounds for tiling in line with the British Standard for tiling, BS 5385.
On floors, that means a flat, rigid base: a properly prepared concrete floor, or a timber floor overboarded with plywood or tile backer board. Our guide to levelling uneven floors before new flooring explains how that is done, and our comparison of tile backer board versus plasterboard covers walls and wet areas. If you are planning heating under the tiles, porcelain herringbone works well with it; see our bathroom underfloor heating cost guide.
Herringbone Tiling Cost in 2026
Herringbone costs more than a straight lay for three reasons: it takes longer to set out and lay, almost every edge tile needs an angled cut, and more tiles are wasted in the process. The figures below are indicative UK ranges for 2026 to help you budget. They are not a quote.
| Item | Typical range |
|---|---|
| Tiling labour, straight lay | £30 to £70 per m² |
| Tiling labour, herringbone | £40 to £100 per m², around 20 to 50% more than a straight lay |
| Ceramic wall tiles for herringbone | £20 to £50 per m² |
| Porcelain floor tiles for herringbone | £30 to £80 per m² |
| Natural stone or marble | £60 to £150 per m² and upwards |
| Extra tiles for wastage | Around 15%, up to 20% in rooms with lots of corners (compared with about 10% for a straight lay) |
Adhesive, grout, trims, backer board and any floor preparation are extra. As a rough example, a 4m² bathroom floor in mid-range porcelain herringbone might come to around £400 to £800 for tiles and laying, before any subfloor work. The same floor in a straight lay would typically be a couple of hundred pounds less. For a small area like a kitchen splashback, tilers often price by the job or the day rather than per square metre.
For how herringbone fits into the wider cost of a bathroom, see our guides to bathroom tiling cost per square metre and what drives the price of bathroom tiling up.
How Long Herringbone Tiling Takes
As a rule of thumb, herringbone takes around one and a half to two times as long to lay as the same area in a straight pattern. A small bathroom floor is usually a day’s tiling, with grouting the following day once the adhesive has set. A kitchen splashback is often half a day to a day. Larger floors, natural stone that needs sealing, or rooms with lots of cuts around fittings take longer.
Common Herringbone Mistakes to Avoid
- No centre line. Starting from a wall rather than a centre line almost guarantees the pattern ends up lopsided.
- Drifting off square. Small errors early on become obvious across a whole room.
- Slivers at the edges. Thin cuts at the doorway or along the bath panel look unfinished; good setting out avoids them.
- Too few tiles. Ordering only 10% extra often means running short, and a second order may not match the first batch.
- Tiling over an uneven surface. Lippage at the points of the pattern is the most common complaint with herringbone floors.
- The wrong tile shape. Tiles that are too square produce a muddled pattern that loses the herringbone effect.
Herringbone Tiles, LVT or Wood?
The herringbone look is also available in LVT and in wood, and the right choice depends on the room. Porcelain herringbone tiles are the most durable and water-resistant option, making them the natural choice for bathrooms, showers, kitchens and hallways, and they work well with underfloor heating. Herringbone LVT is warmer and quieter underfoot, quicker to fit and usually cheaper, and suits kitchens and living spaces. Wood herringbone brings genuine warmth and character to living rooms and bedrooms but is not suited to wet areas. For bathrooms specifically, our comparison of vinyl, LVT or tiles for a bathroom floor goes into more detail.
About Kew Construction
Ariel runs Kew Construction from Liverpool, a family-run business delivering building, renovation and flooring work across Merseyside, including herringbone flooring, LVT and porcelain and ceramic tiling. Kew Construction holds two verified Google Business Profiles covering Liverpool and the surrounding area, and is reviewed on Checkatrade, MyBuilder and Trustpilot. If you are planning a herringbone floor, shower wall or splashback, call Ariel on 07453273876 or email Info@kewconstruction.com. Finished work is on Instagram.
Frequently Asked Questions
How much does herringbone tiling cost in the UK?
Herringbone tiling labour typically costs around £40 to £100 per m² in 2026, roughly 20 to 50% more than a straight lay. Tiles range from about £20 per m² for ceramic wall tiles to £150 per m² or more for natural stone. As a rough guide, a 4m² bathroom floor in mid-range porcelain herringbone costs around £400 to £800 for tiles and laying, before any floor preparation.
Is herringbone tiling more expensive than a straight lay?
Yes. Herringbone takes longer to set out and lay, needs an angled cut on almost every edge tile and wastes more tiles. Expect labour to cost around 20 to 50% more than a straight lay on the same area, plus the cost of the extra tiles.
How many extra tiles do I need for herringbone?
Allow around 15% extra for a herringbone layout, and up to 20% in rooms with lots of corners, pipes or fittings. That compares with about 10% for a straight lay. Order everything from the same batch so the shade matches.
What size tiles are best for herringbone?
Long, narrow rectangular tiles give the clearest herringbone pattern, ideally with the length at least three times the width, such as 75 x 300mm or 150 x 600mm. Squatter tiles can be used but produce a busier, less defined pattern.
What is the difference between herringbone and chevron tiles?
Herringbone uses plain rectangular tiles, with the end of each tile meeting the side of the next in a stepped zig-zag. Chevron uses tiles with angled ends that meet point to point, forming a continuous V. Chevron needs tiles made specifically for the pattern; herringbone can be laid with almost any rectangular tile.
Can you have herringbone tiles in a small bathroom?
Yes. Herringbone on the floor, or on a single shower or feature wall, works well in a small bathroom and can make the room feel longer. In very small cloakrooms with lots of pipework, the number of cuts can make a straight lay the neater option.
Should herringbone tiles be laid at 45 or 90 degrees?
Both work. At 45 degrees, the classic layout, the zig-zag runs straight down the room and draws the eye along its length, which suits hallways and long kitchens. At 90 degrees, the pattern looks more structured and there are fewer awkward cuts at the walls.
Can herringbone tiles go over underfloor heating?
Yes. Porcelain herringbone tiles work well over electric or wet underfloor heating, provided a flexible adhesive suitable for heated floors is used and the heating is commissioned in line with the system manufacturer’s instructions before and after tiling.
Which areas does Kew Construction cover?
Kew Construction is based in Liverpool and works across Merseyside, including Crosby, Formby, Maghull, Aintree, Bootle and the Wirral.